Please check out www.kaztechsolutions.co.uk for more of my technical posts, alternately please call us on 01932 268289.
Now moving on to Step 3 - Web Interface.
Now I'm going to keep this really basic Web Interface (WI) installation as this is only a test lab but i may expand on it at a later date.
1. On the XenApp Server that you installed the WI click on configure.
2. You will be presented with a blank WI console, click on Create site in the top right corner.
3. Now I've selected XenApp Services site as i plan to mainly use this WI with a plug in.
4. Check you are happy with the location of the WI and the name of WI.
5. Review your settings and click Next.
6. Your site should have now been created, click Next to configure your site.
7. Give you Farm a name (Good idea to give this the same name that you plan to give your XenApp farm) and add in the XenApp server's. Now I only have one XenApp server at the moment in this environment but you can add to this at a later date, check the XML and transport type and click Next.
8. Select here you plan to present applications through this WI, now I'm going to be playing with streamed and published applications through this WI so I will select dual.
9. Click finish.
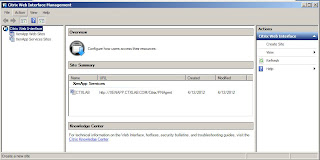
10. You can now see that a basic WI is now configured and I'll be coming back at a later date to back some amendments.
Moving on to Step 4 - Configuring the Farm.


No comments:
Post a Comment