Please check out www.kaztechsolutions.co.uk for more of my technical posts, alternately please call us on 01932 268289.
Step 4 - Configuring the farm.
Ok let me stress that this is only a test environment and there is a hell of a lot more configuration required for a XenApp environment to run smoothly, you now have to start to consider things like Citrix policies, Windows Desktop Experience, session pre-launch, HDX configurations are just among a few that spring to mind. I will be blogging about the above soon so if this is something you would like to see documented keep your eyes peeled on ITGerrish.
1. On the XenApp server click on configure to start to build the XenApp Farm.
2. As this is the first server in a new farm I have to select Create a new server farm.
3. Give the Farm a name and make sure you're happy with the first Citrix Administrator that you are adding to the site.
4. As this is only a test environment I will be using SQL Express as it fits my requirements but if you need to know more information regarding the setup of SQL have a look here.
5. Add in the credentials of the users who will be used to connect to the SQL Express DB.
6. I've left the shadowing options as the default but if you want some more information regarding the setup of shadowing have a look here.
NOTE: By default, shadowing is enabled. Shadowing restrictions are permanent. If you disable shadowing, or change shadowing features when configuring XenApp, you cannot change those settings later. You must reinstall and reconfigure XenApp on the server to change shadowing restrictions.
7a. As this is the first XenApp Server in the farm it will be the data collector.
7b. As i choose to enable XML integration i cannot change the XML server port as this now shares this with IIS.
7c. I added in the WI address that we created in Step 3.
7d. I left the remote desktop users as default too.
8. Review the settings you have just selected and choose apply.
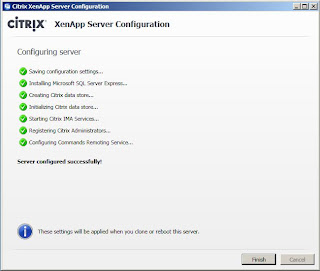
9. Wait for the configurations to finish and this can take a while
10. The installation is now finished and you need to restart your XenApp Server.
11. Looking back at the Server Role Manager you can see that the XenApp server requires a Reboot.
12. Once you have logged back in with the same user account that you configured the XenApp with you will see that a task are now completed.
You are doing ready to start configuring your XenApp environment and i hope you found the step by step guild helpful.


Merci, great explanations
ReplyDeleteThis has help me a lot....setting my own lab..Later production...
ReplyDelete